From iOS iMovie to FCPX Updated.
Yet Again!
In the latest edition of my book From iMovie to Final Cut Pro X: Making the Creative Leap I described how to bring a project from the iOS version of iMovie into FCPX ground through iMovie on the Mac. It was relatively simple, but with the introduction of Big Sur macOS 11 and FCP 10.5 it became simpler than ever.
First, you shoot your movie on your iPhone, and if you’re lucky, a shiny new iPhone 12 or 12 Pro.After you’ve shot your video you can assemble and rough cut it in iOS iMovie. Once you get used to the app, which is quite easy, you can piece together and move around your material quite quickly. Don’t cut too tightly; leaving it loose will let you trim more accurately in FCP with its real-time trimming shortcuts and other tools like the Precision Editor.
The next step is to get your video off your phone. The simplest way is to Share it.
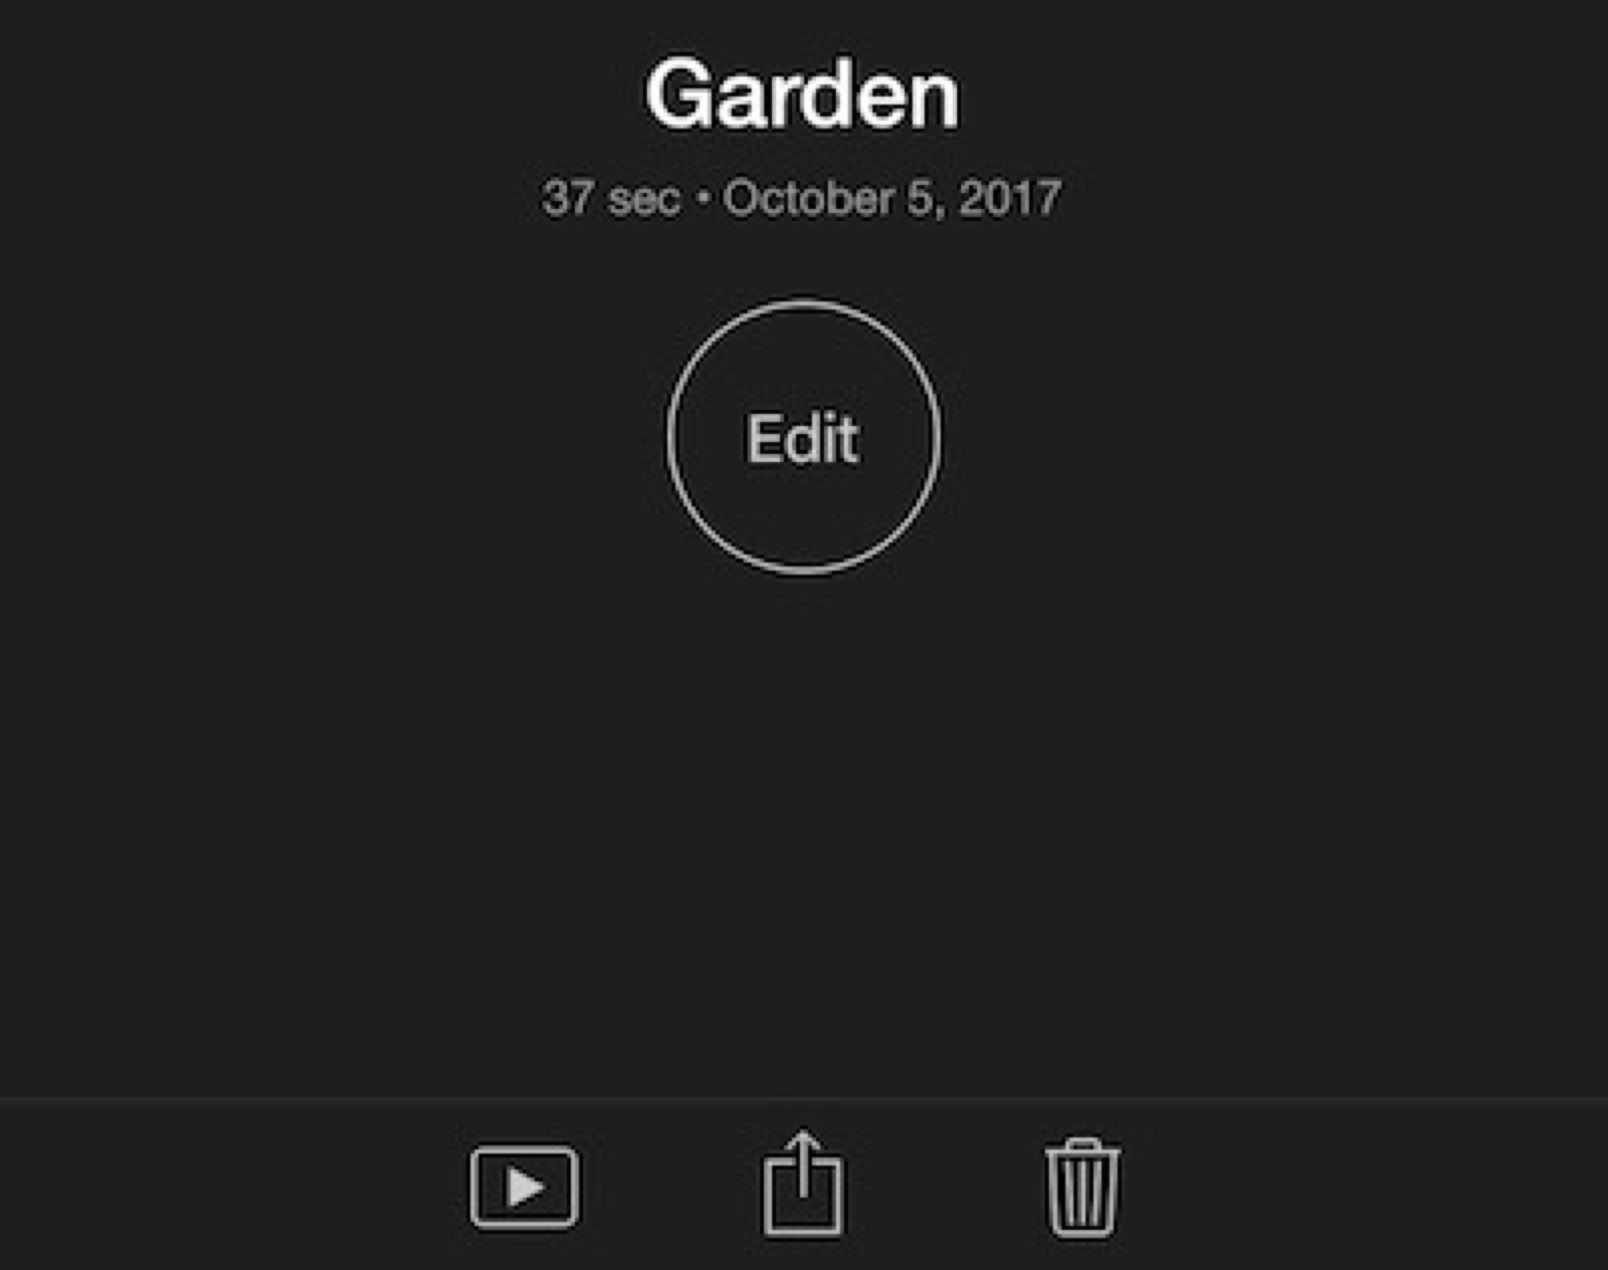
Select the project in iMovie and at the bottom tap the Share button.
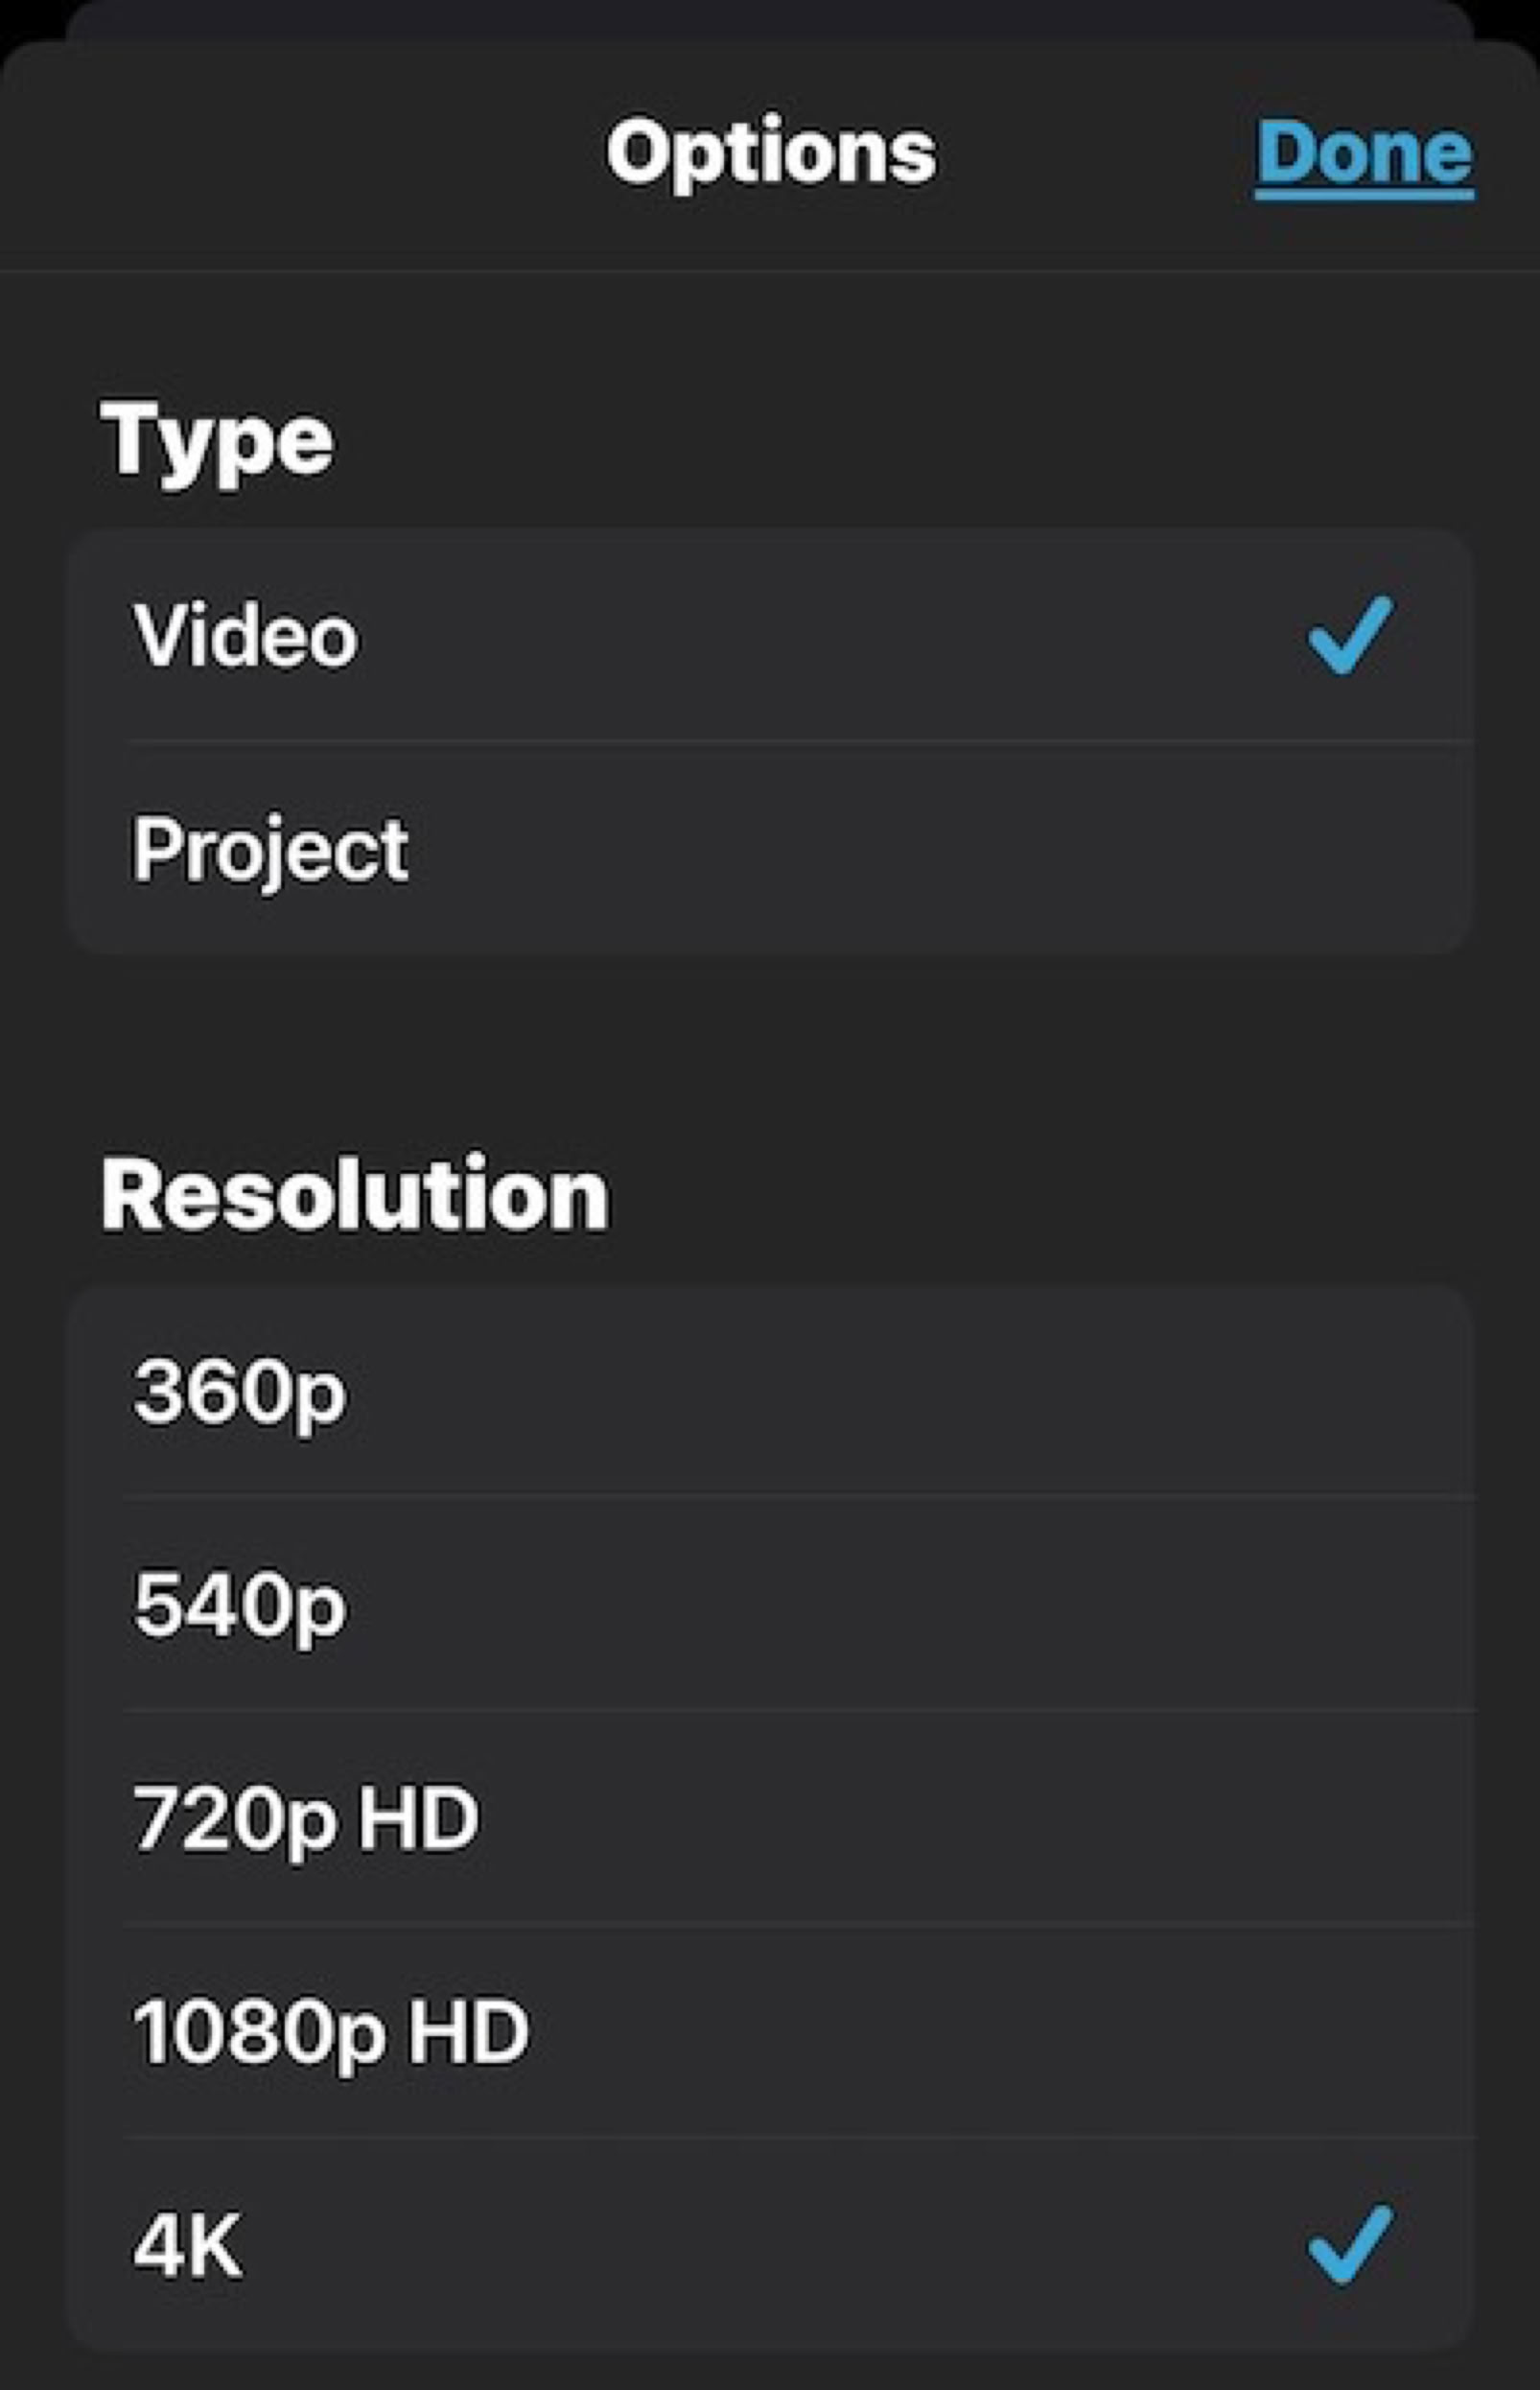
In the available Share options, at the top you’ll see the movie and underneath it an important selection for Options.
Tap on Options.
The screen that appears offers options for Video or Project. Video is the default and is your edited project. You can select the export resolution you want. Rather than Video you should select Project. This sends you the assembled project, as well as its media to the Mac. Tap Done and the in the Share window tap AirDrop. You should see your computer if the phone and the Mac are on the same WiFi network. Tap your computer and the iOS app will begin to prepare the project. Depending on how much video you’re sending it might take a while.After it finishes preparing, it will then send everything to your Mac.
The project will appear in your Downloads folder with the name of the project with the .iMovieMobile extension.
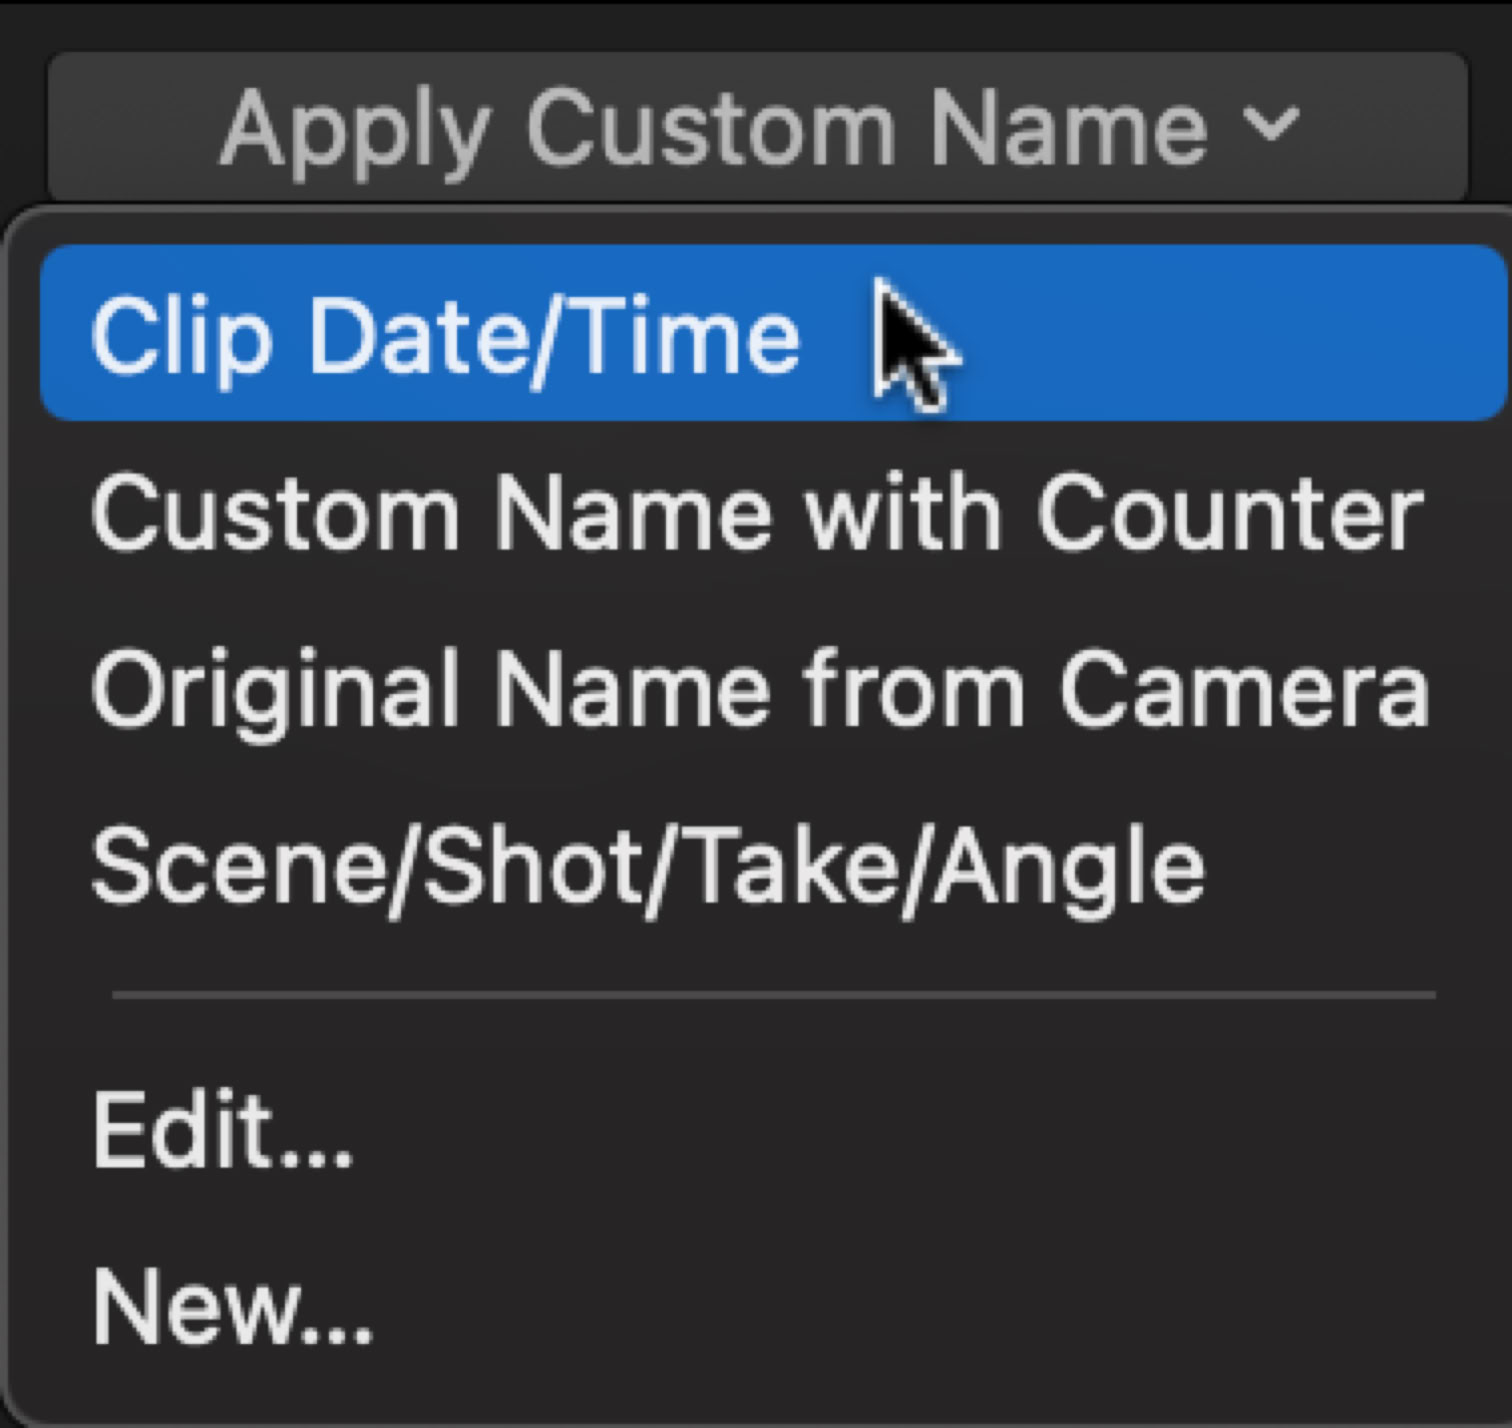
Launch FCP and simply use File>Import>iMovie iOS Projects. The project will appear in your library as a new event with the iMovie project name. There will be the edited project together with all the media, which will have horribly long names like some kind of code. To make things a little easier I would suggest assigning custom names. Select all the clips at the the bottom of the Info inspector use Apply Custom Name and then perhaps use Clip Date/Time, which will put the clips the order in which they were shot.
That’s it. Trim it, add effects and titles, and export it to the world.
Copyright © 2017-2020 South Coast Production
Aug 12, 2021